Connecting to WebSockets via Postman UI
This tutorial will guide you through connecting to a WebSocket using Postman and sending a subscription message.
Step 1: Open Postman
Ensure you have Postman installed and opened on your system. If you don’t have it yet, download it from Postman’s official website.
Step 2: Create a New WebSocket Request
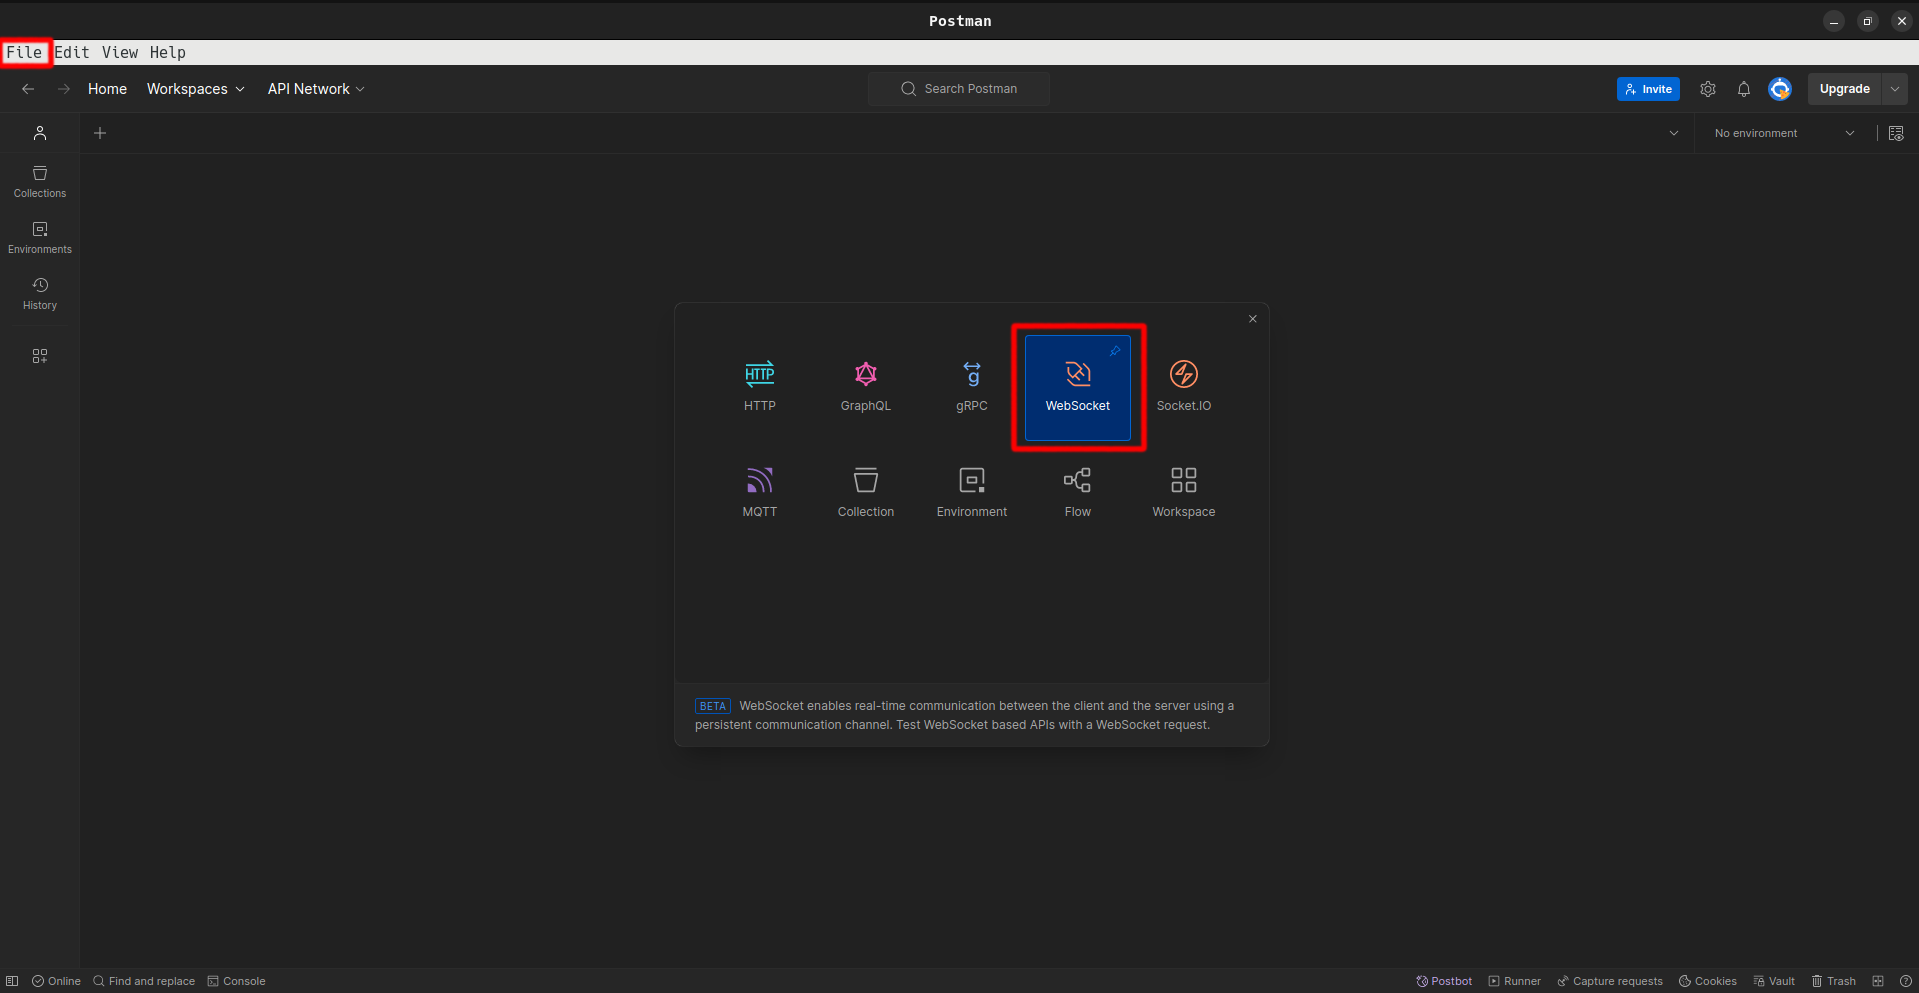
- In Postman, click on File > New... > WebSocket.

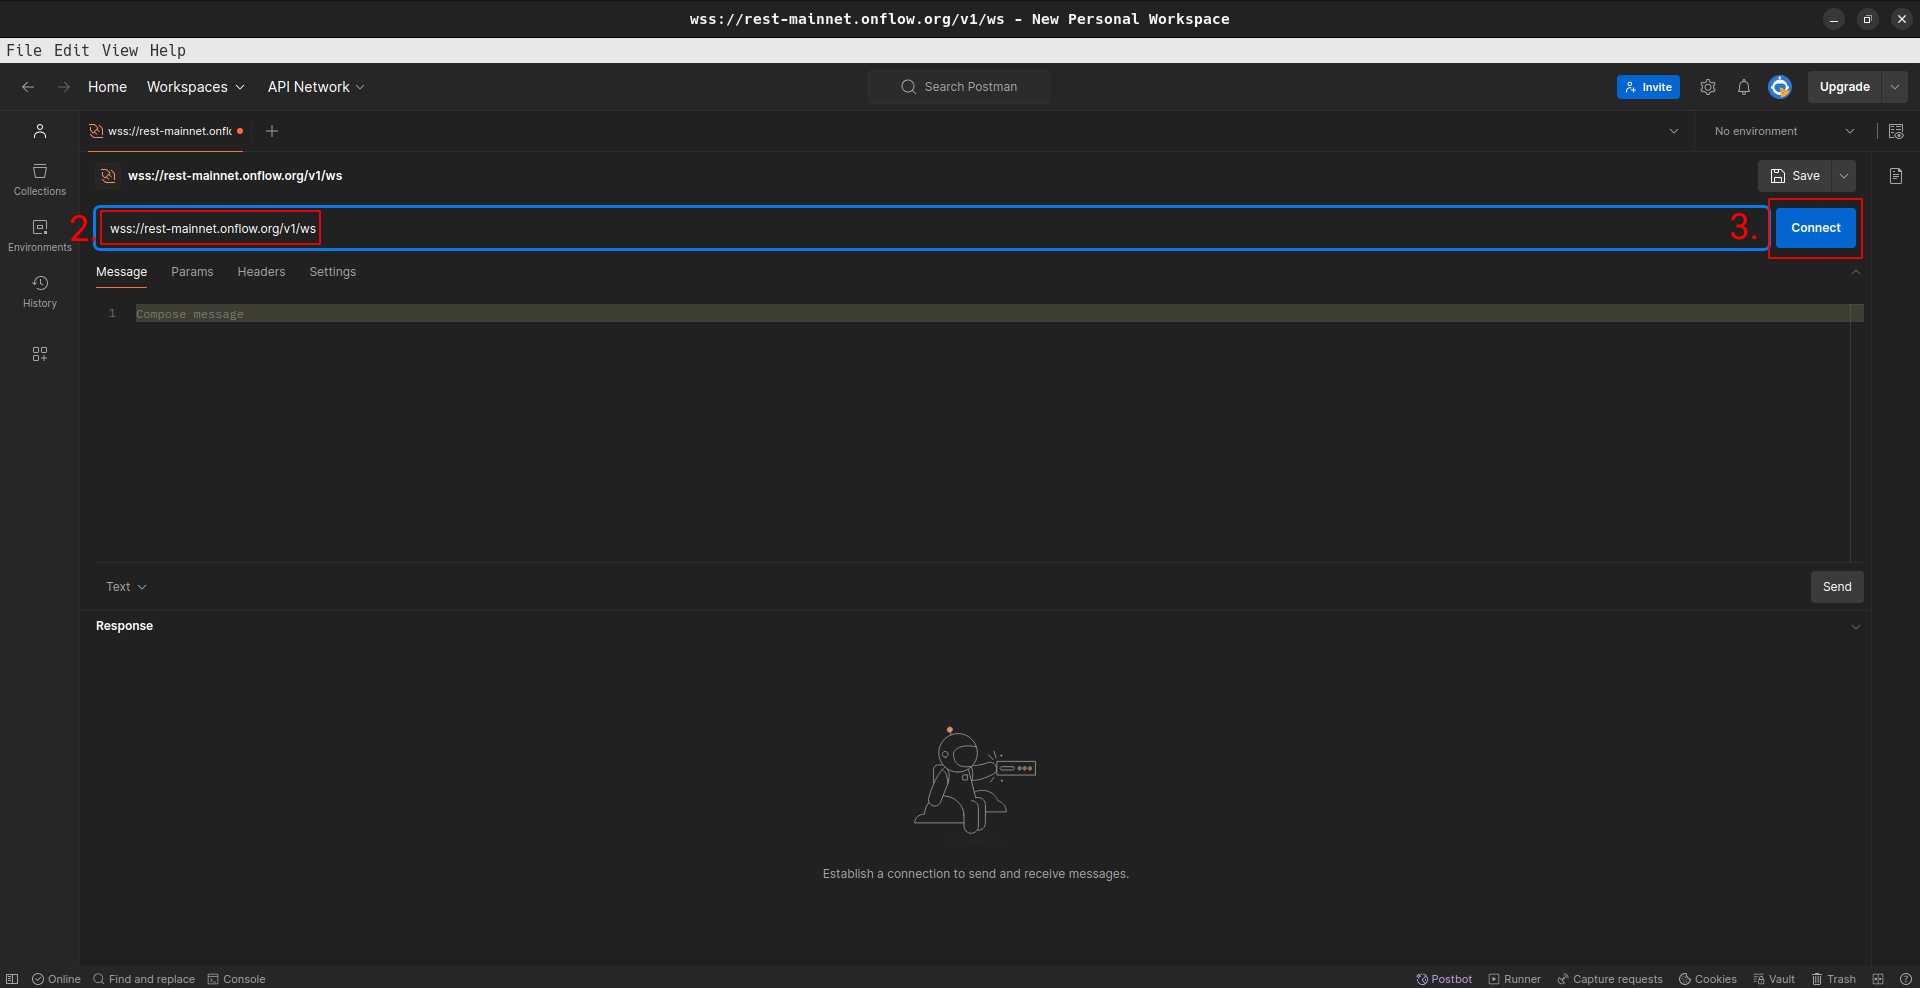
- Enter the WebSocket URL in Enter URL field :
wss://rest-mainnet.onflow.org/v1/wsorwss://rest-testnet.onflow.org/v1/ws - Click Connect button to establish the WebSocket connection.

Step 3: Send a Subscription Message
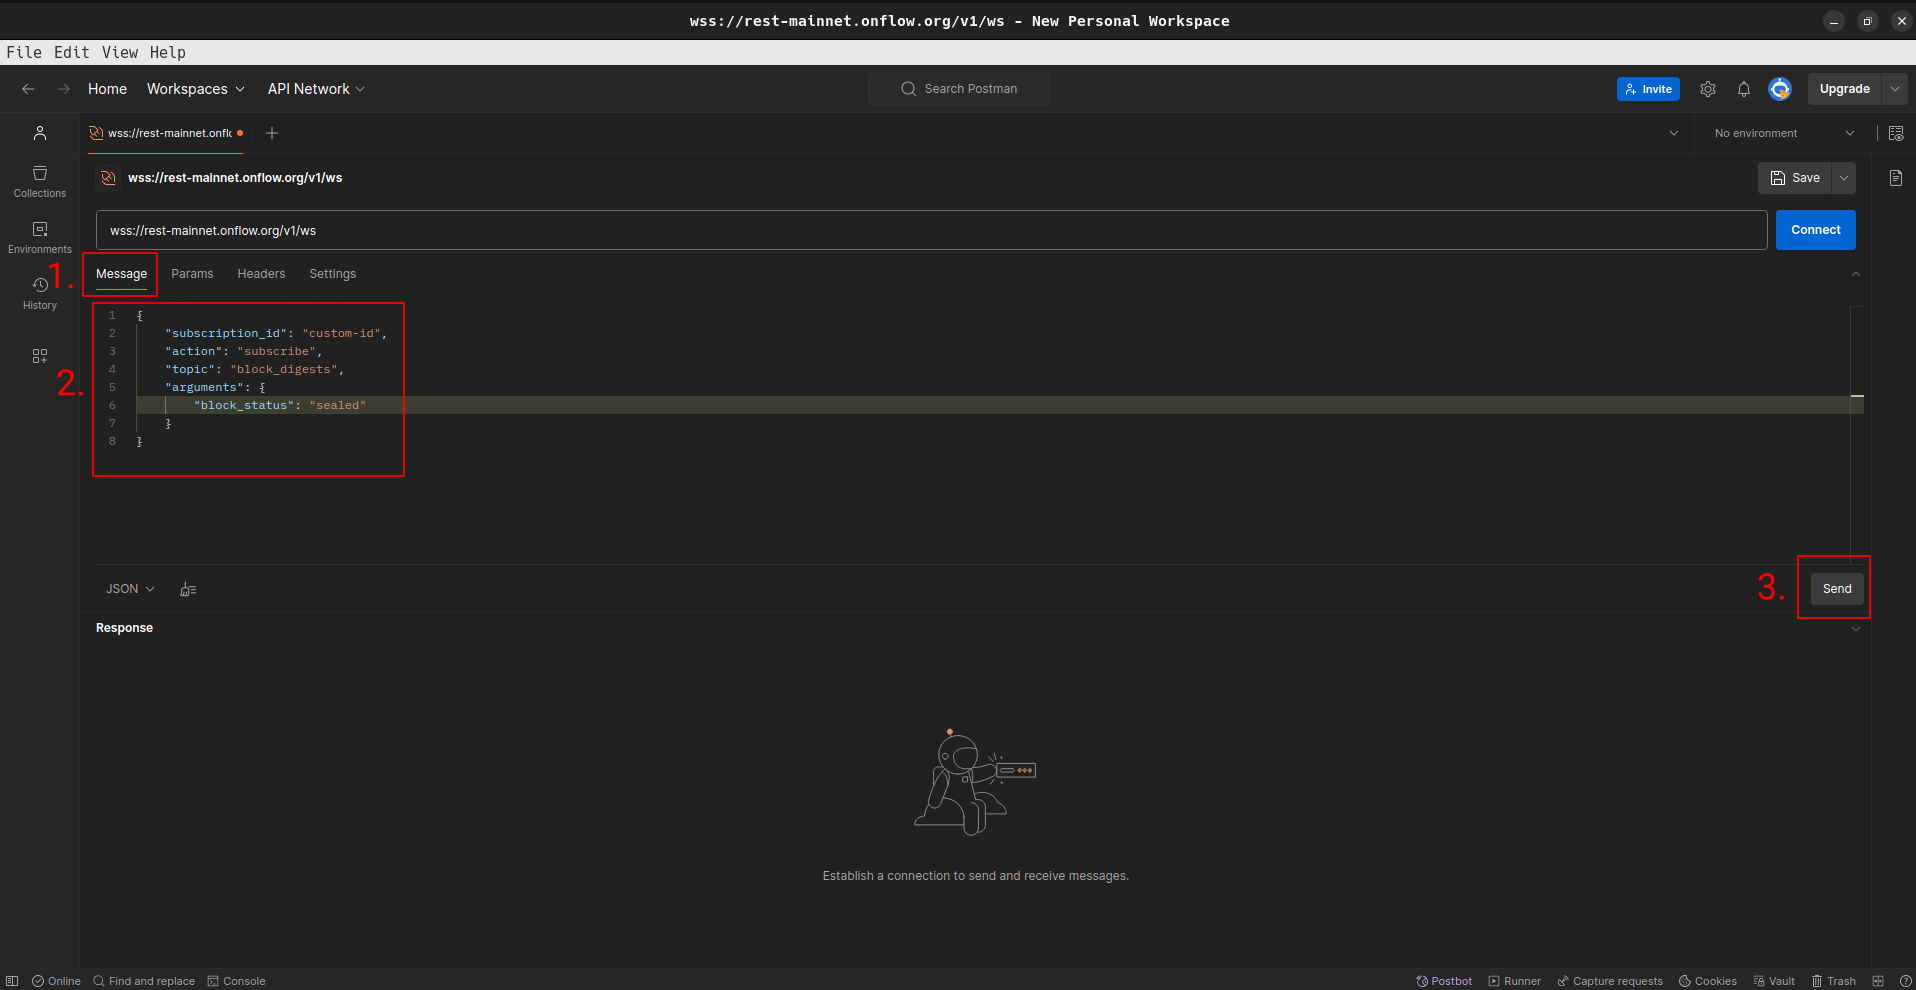
- Once connected, go to the Messages tab.
- Enter the JSON message into the text box. In this example the digests block subscription will be established. For other available topics check Supported topics page.
- Click Send to subscribe to the WebSocket topic.

Step 4: View Responses
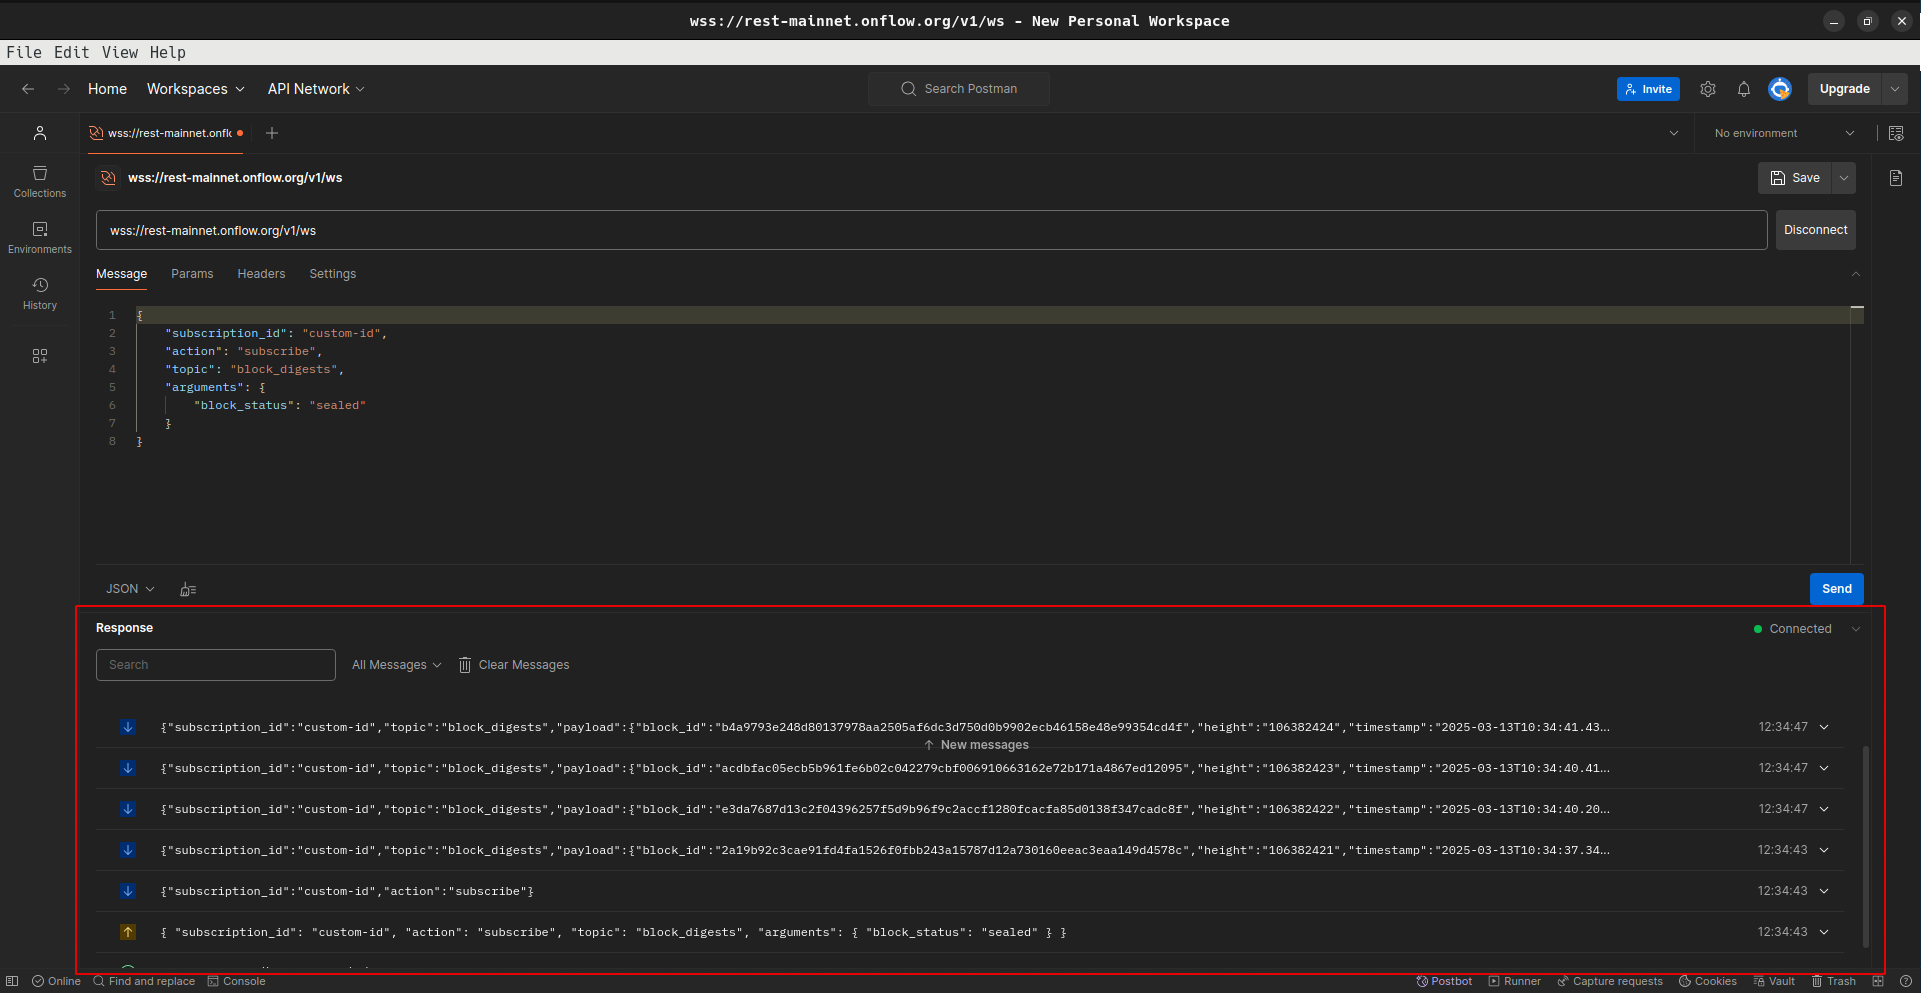
- After sending the message, you should start receiving responses in the Response bottom tab.
- Each message received from the server will be displayed in real-time.

Step 5: Disconnect
- When you are done, click Disconnect to close the WebSocket connection.
Troubleshooting
- Ensure WebSocket URL is correct and active.
- In case of an error validate your JSON message for any syntax errors before sending and check correctness of all arguments on Supported topics page.
Congratulations! You have successfully connected to a WebSocket server using Postman and sent a subscription message.